ABOUT:
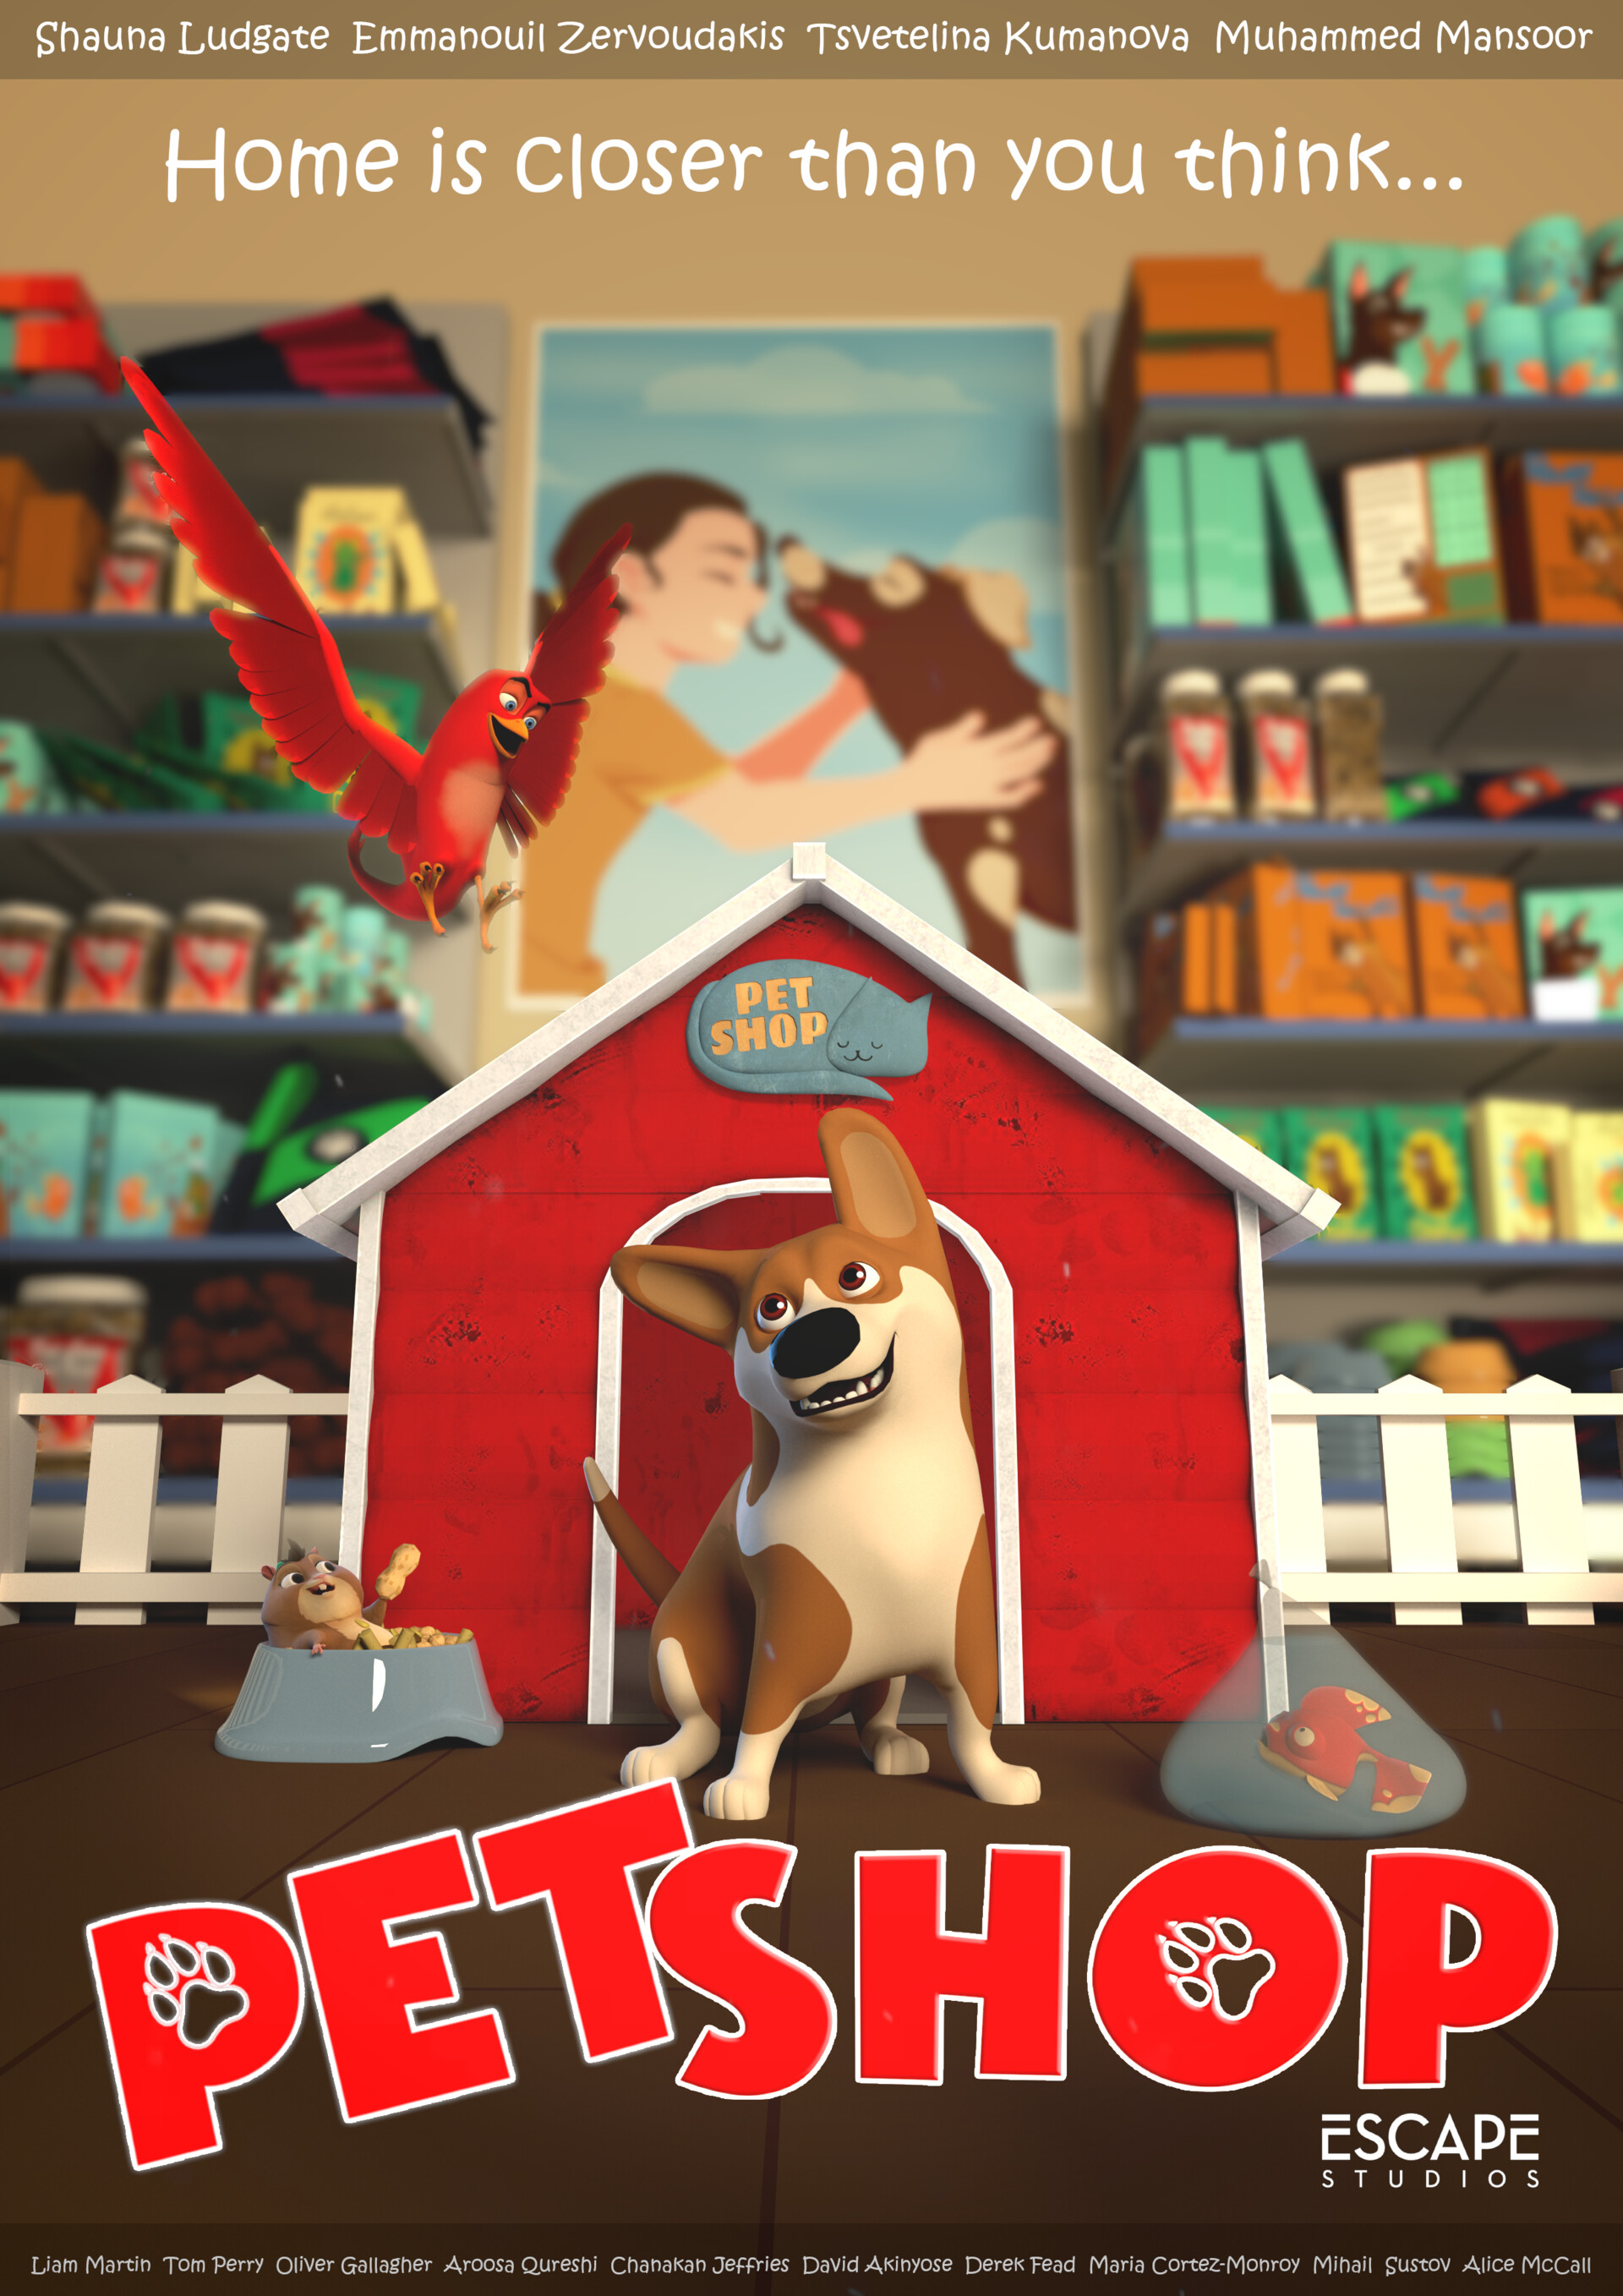
'Pet Shop' is an award winning 3D animated TV series trailer which is written & directed by Shauna Ludgate and produced by Manos Zervoudakis, within six weeks, entirely remotely at Escape Studios in London. It is In the below blog I will share my experience as a Producer and a breakdown of the production process.
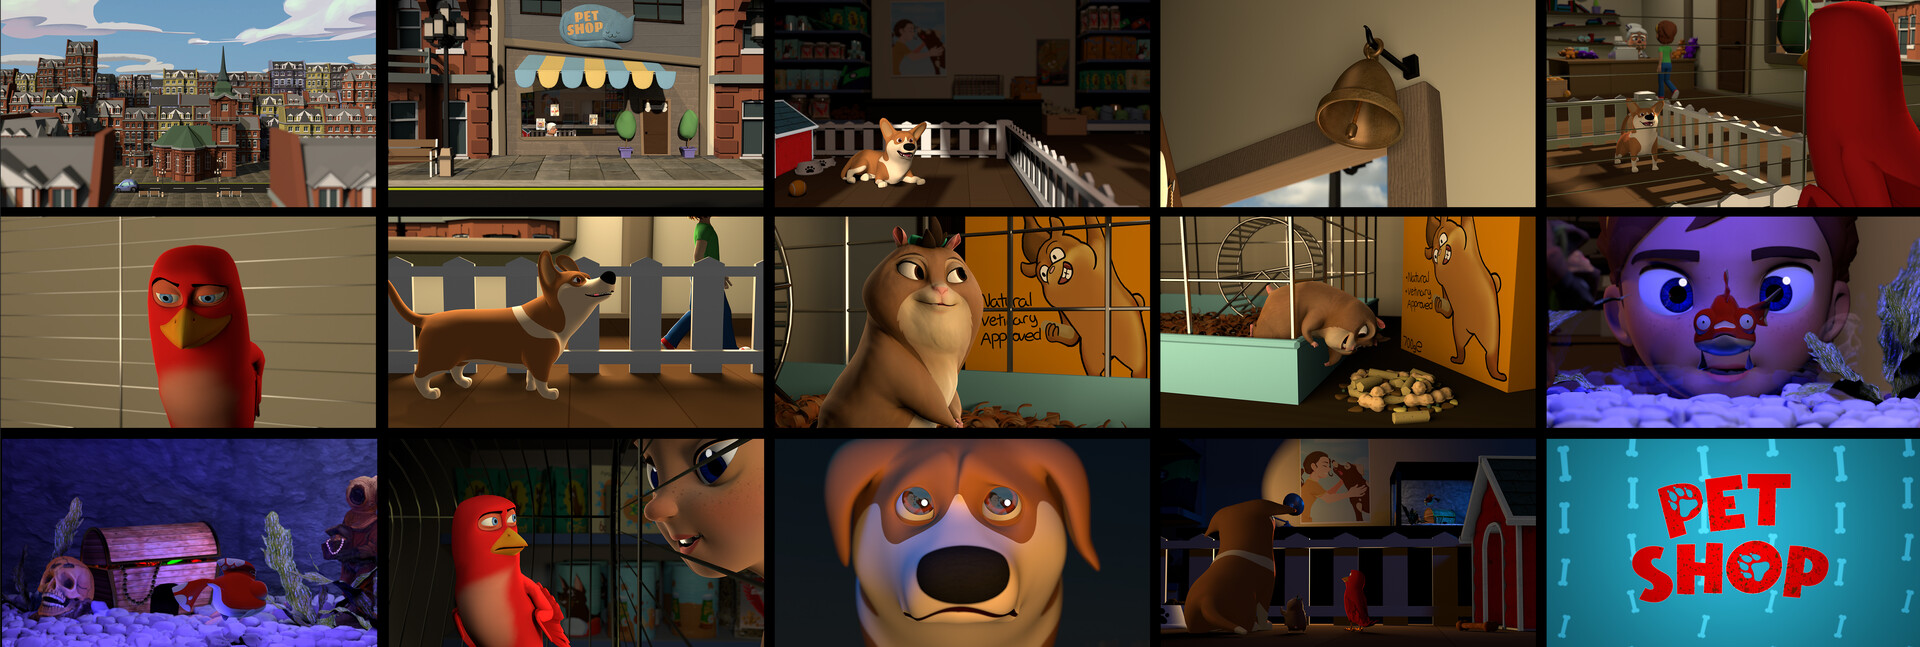
SHORT FILM:
The story is about the daily life of 4 furry friends waiting to be adopted. Duke is new in the shop and brings hope to the other pets that they will find a home, whilst finding a family within each other. The main story arc of the series is getting the characters adopted whilst causing chaos and making friends.
STORYBOARDING:
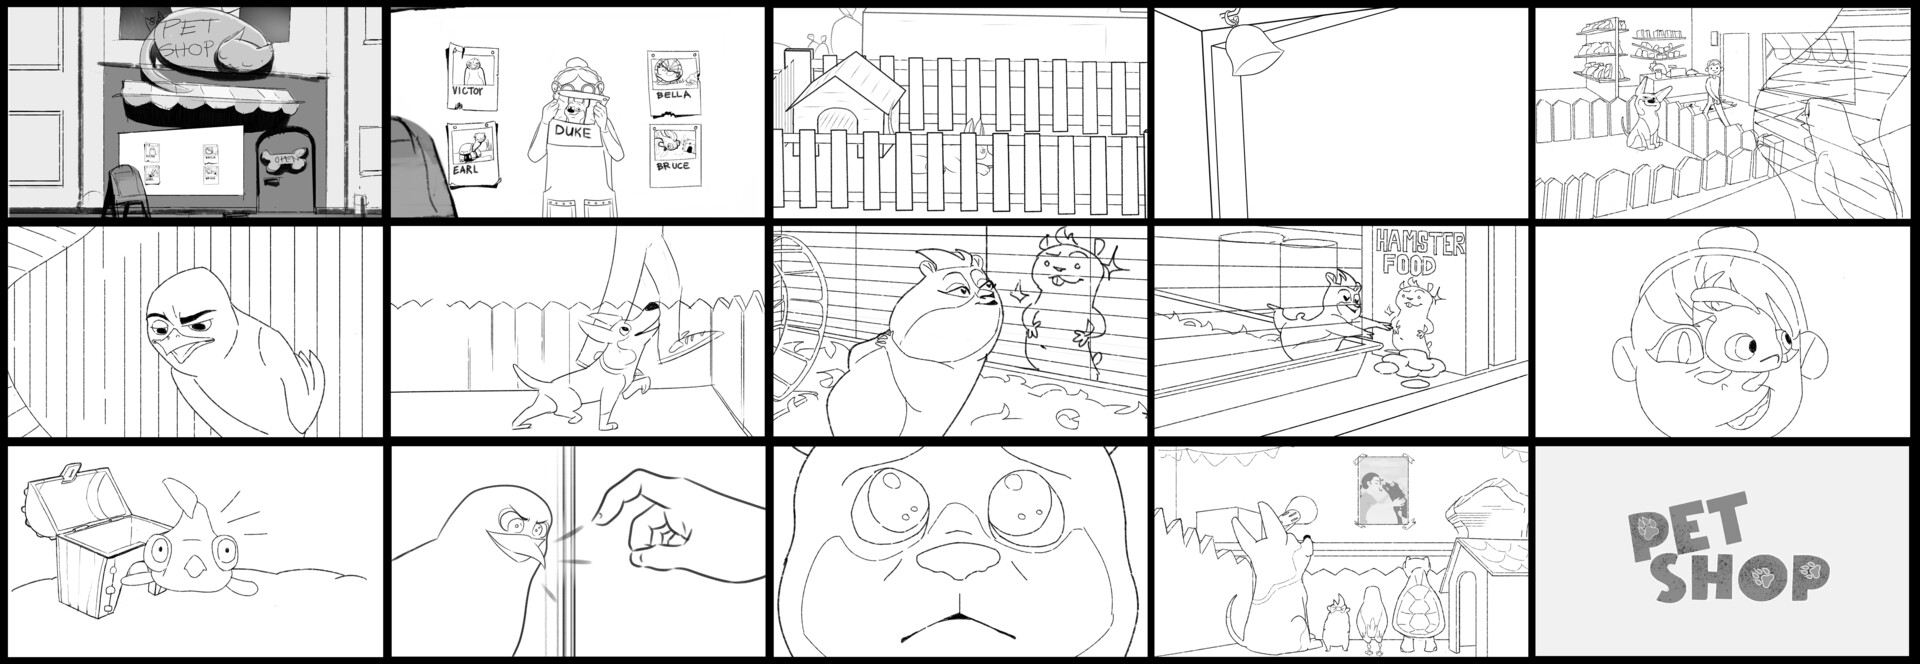
For the first two weeks, our director, Shauna Ludgate, collaborated closely with the storyboarding team to refine the script and shots. Their primary focus was on planning camera angles and creating the 2D panels. This stage was really important for the team to feel confident that we are moving into Previz with a story that works well.
COLOUR SCRIPT:
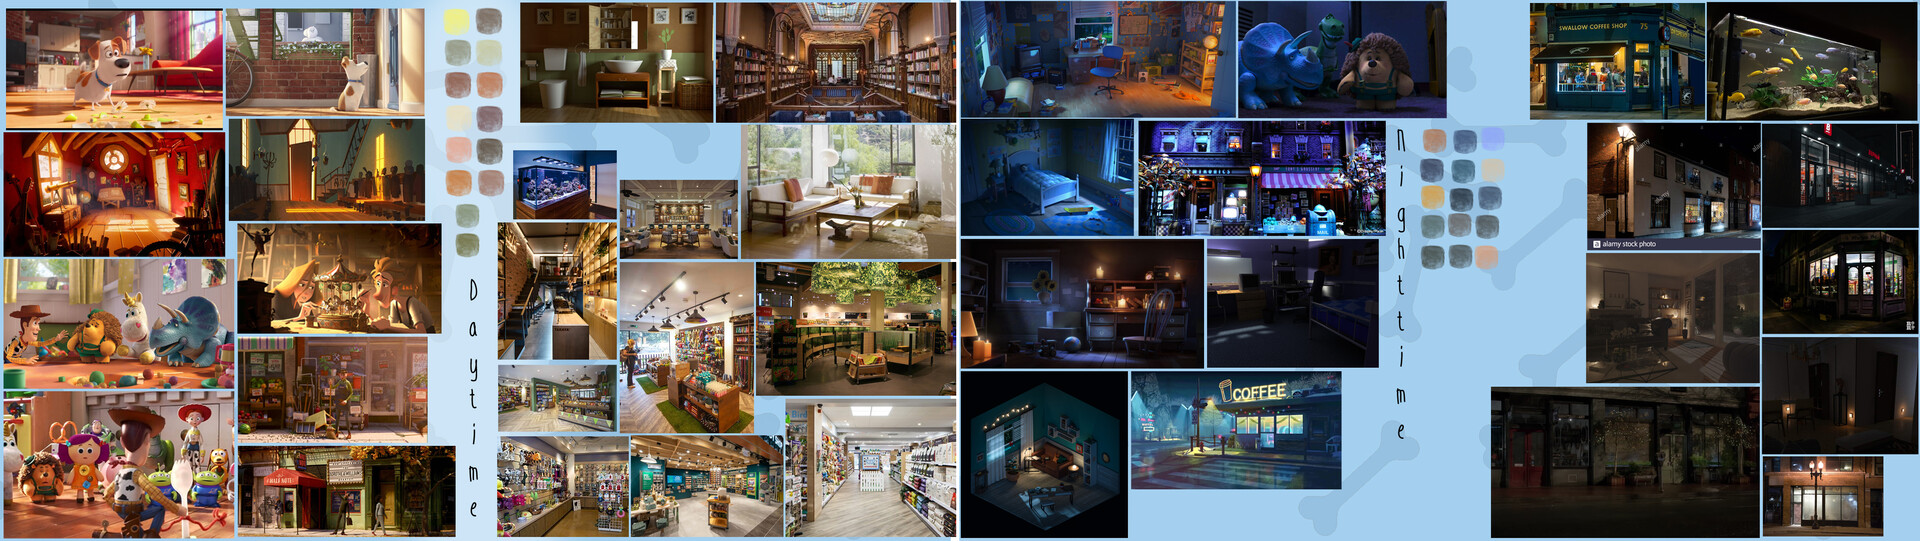
Our Art Director, Tsvetelina Kumanova, made the deliberate choice to utilize warm colours such as orange and yellow for the day-time shots, while opting for cooler, bluish tones for the night-time shots.
Check out the images below to see our colour script and lighting moodboard.

CHARACTER DESIGN:
Due to the limited timeframe of only 6 weeks for this project, we made the decision to utilize pre-existing rigs for most elements, with the exception of one character, Bruce the fish. After going through numerous fish references, we went for a straightforward design that incorporated warm colours, emphasizing his calm personality.
Check out the video below to see Bruce's different design stages.
CHARACTER EXPRESSION SHEET:
In addition, we collaborated with the storyboarding team to develop a character expression sheet. This sheet served the purpose of not only showcasing each character's personality but also providing our rigger with an understanding of the full range of facial movements required.

MODELLING & RIGGING:
Bruce was entirely modelled and rigged by us. To create the illusion of being underwater, we employed a combination of blend shapes and nCloth simulations. By utilizing this approach, the simulation engine took care of generating the desired wavy movements for the fins which allowed the animators to concentrate more on Bruce's facial expressions and overall body movements.
Click the video below to see a full character turnaround in different stages.
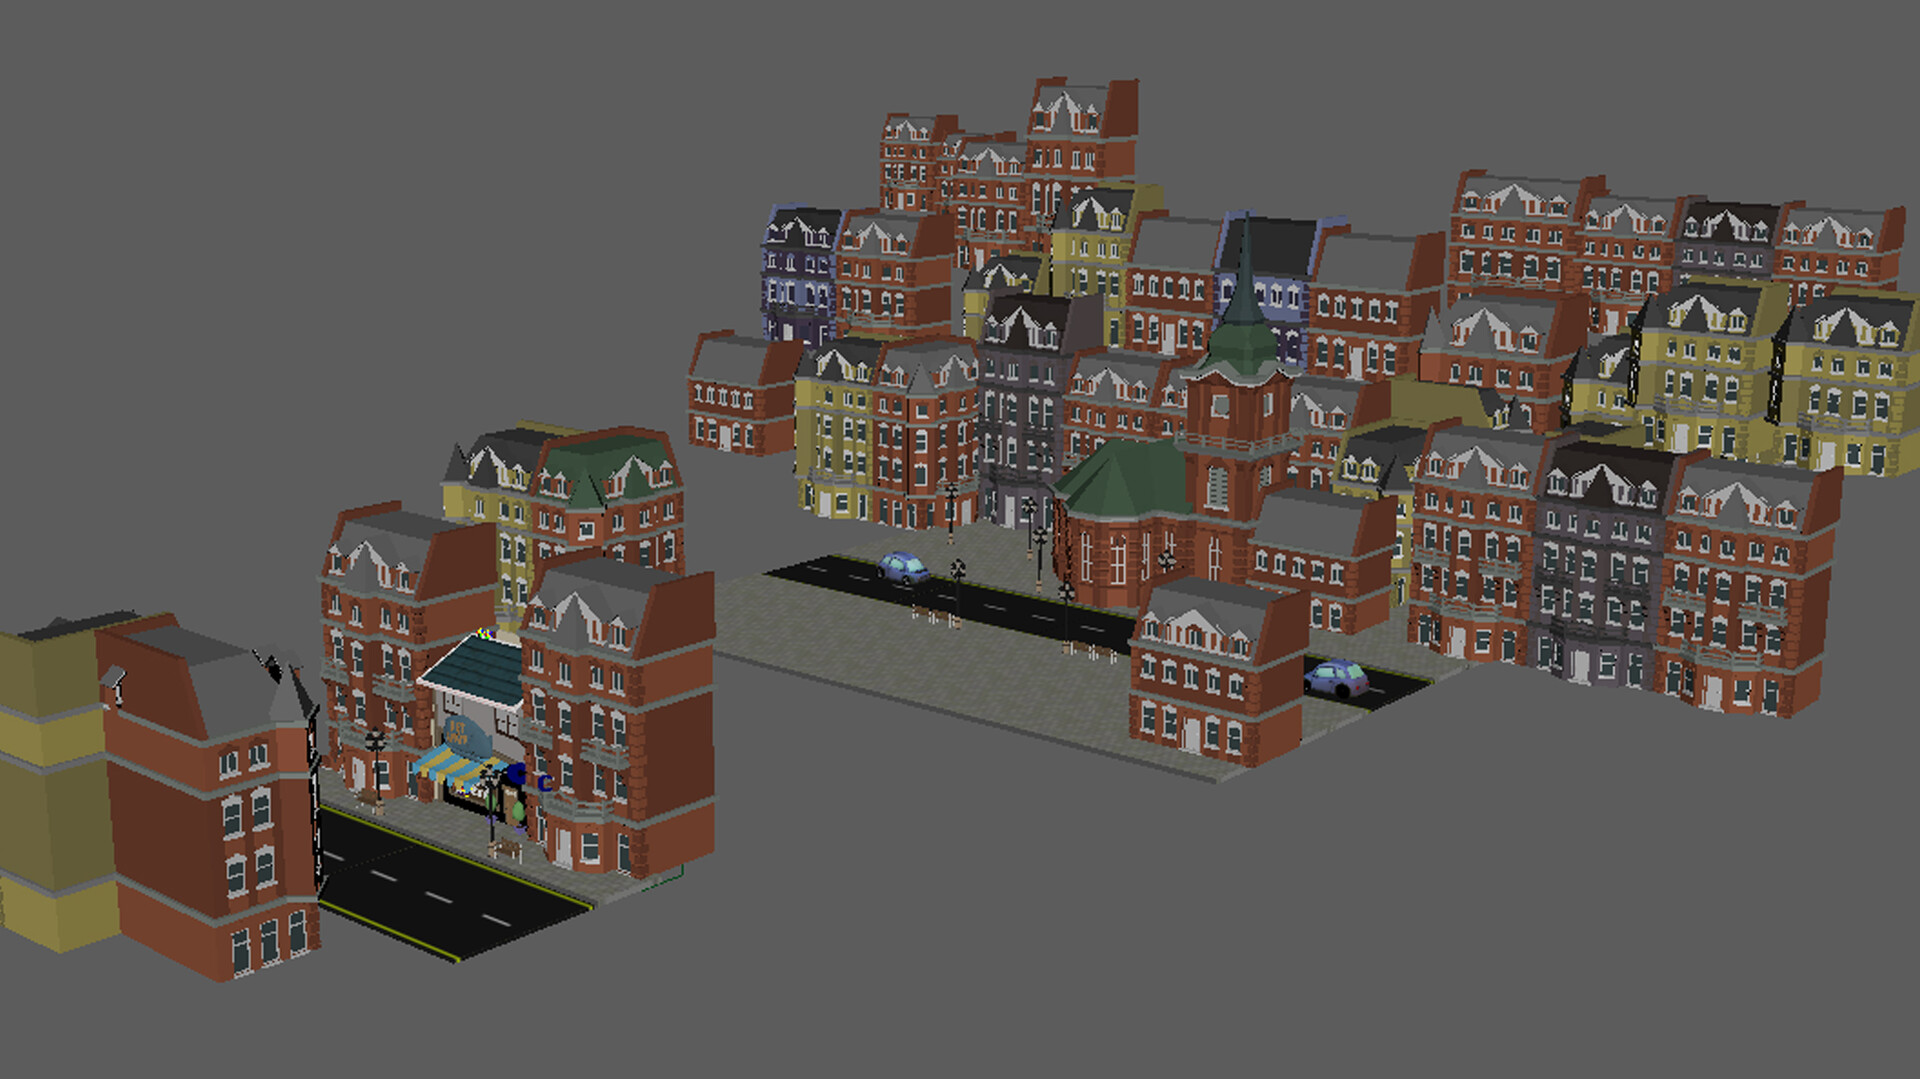
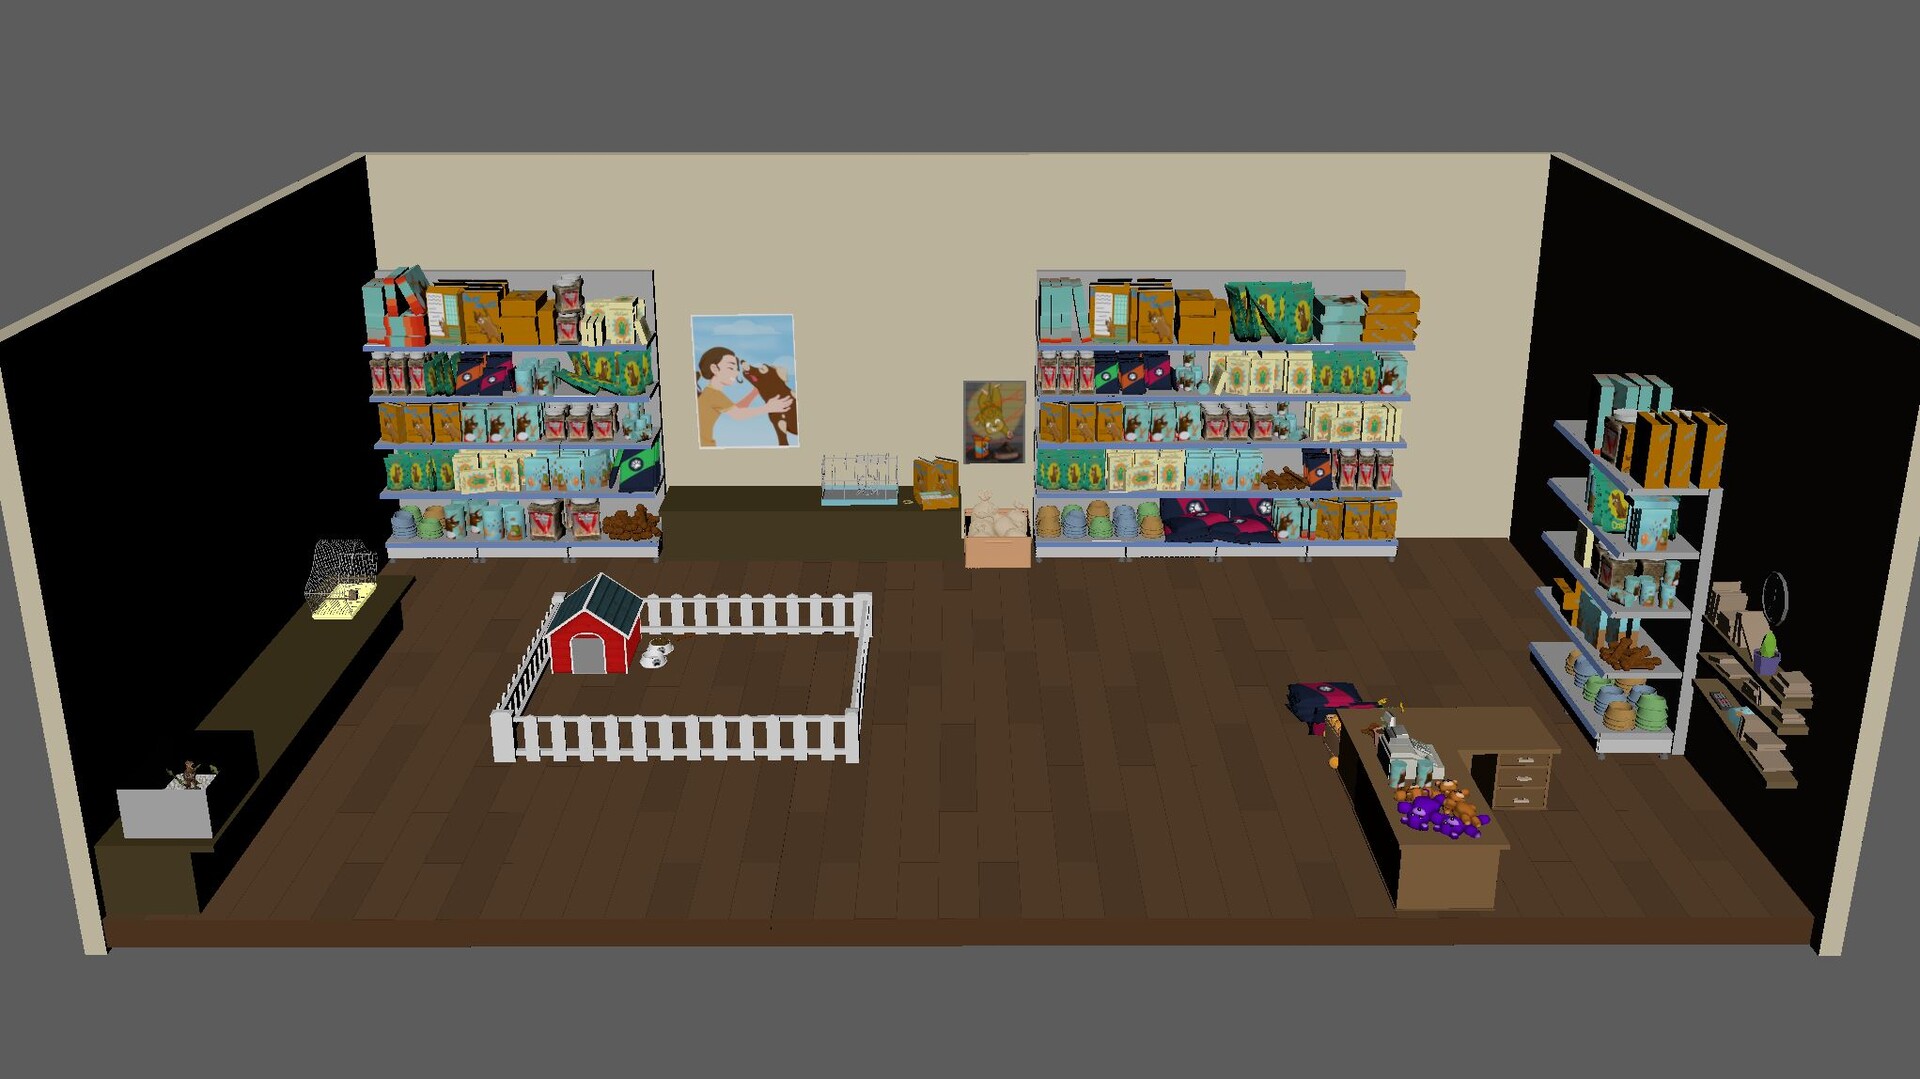
3D LAYOUT:
Following that, we initiated the process of establishing the basics for the layout of our pet shop. Once again, considering the limitations of time, we made the decision to model only a select number of items. However, it's worth noting that most textures for the items in the shop are original.
REFERENCES:
References were an important part of our production process and helped us massively during animation. The team used a mixture of animal references for natural creature behaviours, and live action filmed references for lip syncing and human actions.
Check the two videos below for examples of the references we used during an early stage of animation.
ANIMATION BREAKDOWN:
Following a proper animation workflow was key, so we made sure that all animators started from blocking out their shots, then moving to splining and then polishing them as a final step. By doing that we managed to improve the overall quality of animation for the project.
Check out the video below to see the differences in animation between each step, from previz to the final render.
LIGHTING:
We employed a traditional three-point lighting setup, incorporating a key light, a fill light, and a rim light. Additionally, we utilized light linking, which enabled us to introduce additional lights that were specifically assigned to illuminate particular objects rather than the entire environment.
RENDERING:
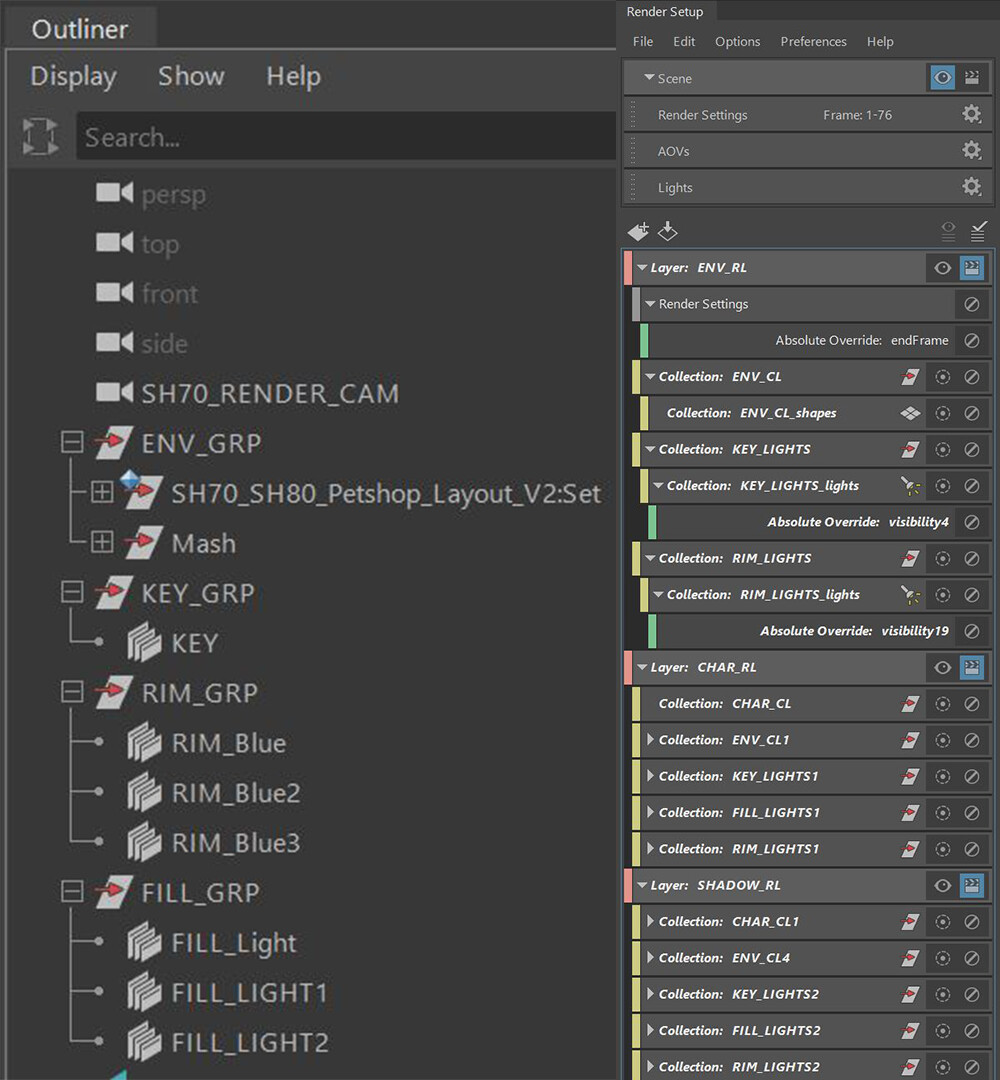
We constructed a rendering layer system with AOV's, allowing us to render backgrounds, shadows and characters separately. These technical applications didn't only help us be more efficient with our setups and renders but also be proactive and plan our composition in NukeX.
Check out the image below for our render layers and settings.
COMPOSITING:
The final renders were composed collectively in NukeX, utilizing all the different render layers and AOVs. This allowed us to control the light exposure to maintain consistency across shots, modify the colour gradient of specific elements within the environment or characters, and address any shadow-related issues.
To streamline the process, we employed a master comp script that encompassed all twelve shots within a single project file. This was possible due to the relative simplicity and lightweight nature of our scripts. Key nodes utilized in the composition workflow included shuffles, merges, Zdefocus, and grades.
Furthermore, we incorporated 2D drawings of clouds into our initial shot. These drawings were initially created in After Effects, after which they were composited and tracked within Nukex.
Check out the below video to see all the different visuals between stages.
PRODUCTION:
We mainly used Excel to create the production schedule and some other documents to help us track the progress of the different stages of each shot, as well as managing all our assets and calculating our render times.
See the three images below for the key planning tools we used.
Image 1 - Production Schedule:
The Production Schedule helped the team have a general overview of each task, duration, and progress. All the tasks from the left side of the schedule are displayed on the right side in a form of calendar, known as Gantt Chart, with the working days marked as blue blocks.

Image 2 - Shot Plan:
The Shot Plan helped us track the progress of each shot, which means tracking the whole process of animation, lighting, rendering and comp. It displayed all the shots, the frame range of each shot, approved cameras, status of the actual animation, lighting etc. Also, it allowed each department to pass on their work to the next one by simply choosing the right action from the drop-down lists.
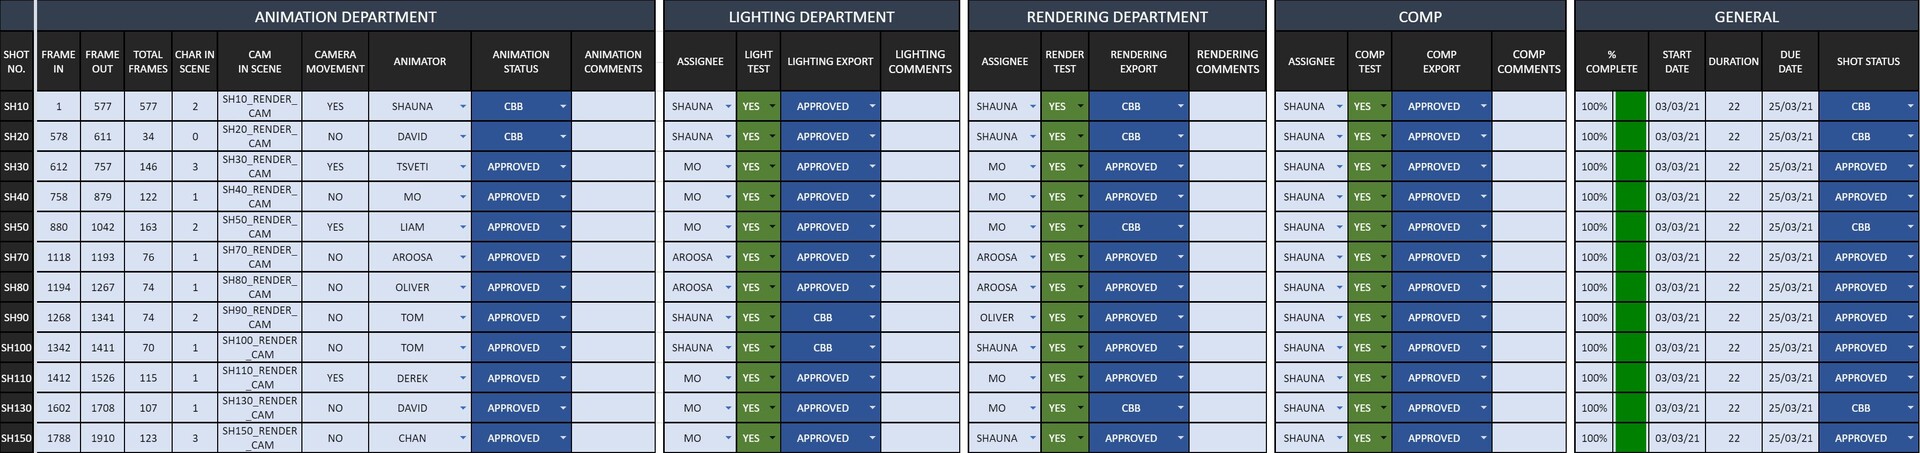
Image 3 - Render Stats:
The Render Stats displayed rendering data which helped the relevant person understand how long it will take them to render each render layer, each frame, each shot etc. This document took most of its data from the Shot Plan so when animators were updating their shots, this was getting updated automatically as well.

PERSONAL REFLECTION:
'Pet Shop' is my second group project and it was a blast! I had the opportunity to work with some really talented people who showed great spirit and dedication during those 6 weeks. it was challenging but very rewarding. The biggest learning for me, beyond technical skills, was that teamwork and accountability are critical to ensure a successful project!
THE TEAM:
Writer & Director: Shauna Ludgate
Producer: Emmanouil Zervoudakis
Art Director: Tsvetelina Kumanova
Storyboarding: Shauna Ludgate, Oliver Gallagher, Chanakan Jeffries, Tsvetelina Kumanova & Aroosa Qureshi
Colour Script: Tsvetelina Kumanova
3D Layout: Muhammed Mansoor & Shauna Ludgate
Modelling & Texturing: Tom Perry & Oliver Gallagher
Rigging: Tom Perry
Animation: Muhammed Mansoor, Tsvetelina Kumanova, Liam Martin, Oliver Gallagher, Shauna Ludgate, Aroosa Qureshi, Chanakan Jeffries, David Akinyose, Tom Perry & Derek Fead
Lighting & Rendering: Shauna Ludgate & Muhammed Mansoor
Compositing: Shauna Ludgate
Music: Maria Cortes-Monroy
Sound Design: Mihail Sustov
Motion Graphics: Alice McCall
Editing: Liam Martin & Emmanouil Zervoudakis
Voice Acting: Cameron Bier (Duke), Ellie Wills (Bella) & Muhammed Mansoor (Victor)